What are the methods to make figure animations?
1. Traditional frame by frame drawing by animators.
2. Motion capture of human movement and transfer data to 3d models.
3. Stylize a video using AI tools to make it look as an animation.
How to make a figure animation use img2img batch in Stable Diffusion Webui?
1. If you don’t have stable diffusion Webui installed, go to Install stable diffusion webui on Windows.
2. If you haven’t installed ControlNet, go to install ControlNet in Stable Diffusion Webui.
3. Go to civitai.com to download a checkpoint with an animation style you like, for example, Rev Animated. Put it as “models\Stable-diffusion” directory.
4. (Optional) If you want more defined edges for your animation, download a lora model thicker lines Anime Style. Put it at “models\Lora” directory.
5. Go to TemporalNet to download “diff_control_sd15_temporalnet_fp16.safetensors” and “cldm_v15.yaml.” Rename “cldm_v15.yaml” to “diff_control_sd15_temporalnet_fp16.yaml.” Put two files at “extensions\sd-webui-controlnet\models” directory. TemporalNet is one of ControlNet models that enhances the consistency of generated images and reduce flickering.
6. Prepare a video witch a character is dancing or actioning. If the video doesn’t have a green screen as background, remove the background with software tools and fill background with a green screen. Render it as an image sequence and put them in one directory.
7. Run “webui-user.bat” to open Stable Diffusion Webui. Click Settings tab. Select “User Interface” from the left menu. At [Info] Quicksettings list, add “initial_noise_multiplier.” Then, select “ControlNet” from the left menu, check “Do not append detectmap to output.” Click Apply settings and Reload UI buttons.
8. After you reload the webui, select a checkpoint, such as “revAnimated.” Click img2img tab, load the first image in the image sequence. Enter your prompt to describe the video. Set Noise multiplier for img2img to 0.75~0.9.
9. (Optional) If you decide to use lora models to improve the quality of output images, click the “Lora” tab. Click the “refresh” button on the right (Lora screen) to see the lora models you have. Click the one you want. It will add “<load: model name>” to your prompt.
10. Change Width and Height to the size of your image. Set CFG Scale to be 7. Set Denoising strength to be 0.75~0.9. Note when increasing CFG Scale and Denoising strength, the generated images look more different from the original images and follow closer to your prompts. When you increase denoising strength, increase Noise multiplier for img2img the same or close to denoising strength to reduce blurriness of images.
11. Expand ControlNet section. In ControlNet Unit 0, check “Enable”. In Control Type, select “OpenPose”. Set Preprocessor to be “dw_openpose_full”. Set Model to be “control_v11p_sd15_openpose.” Check “My prompt is more important. ” This will improve the pose and fingers of the character.
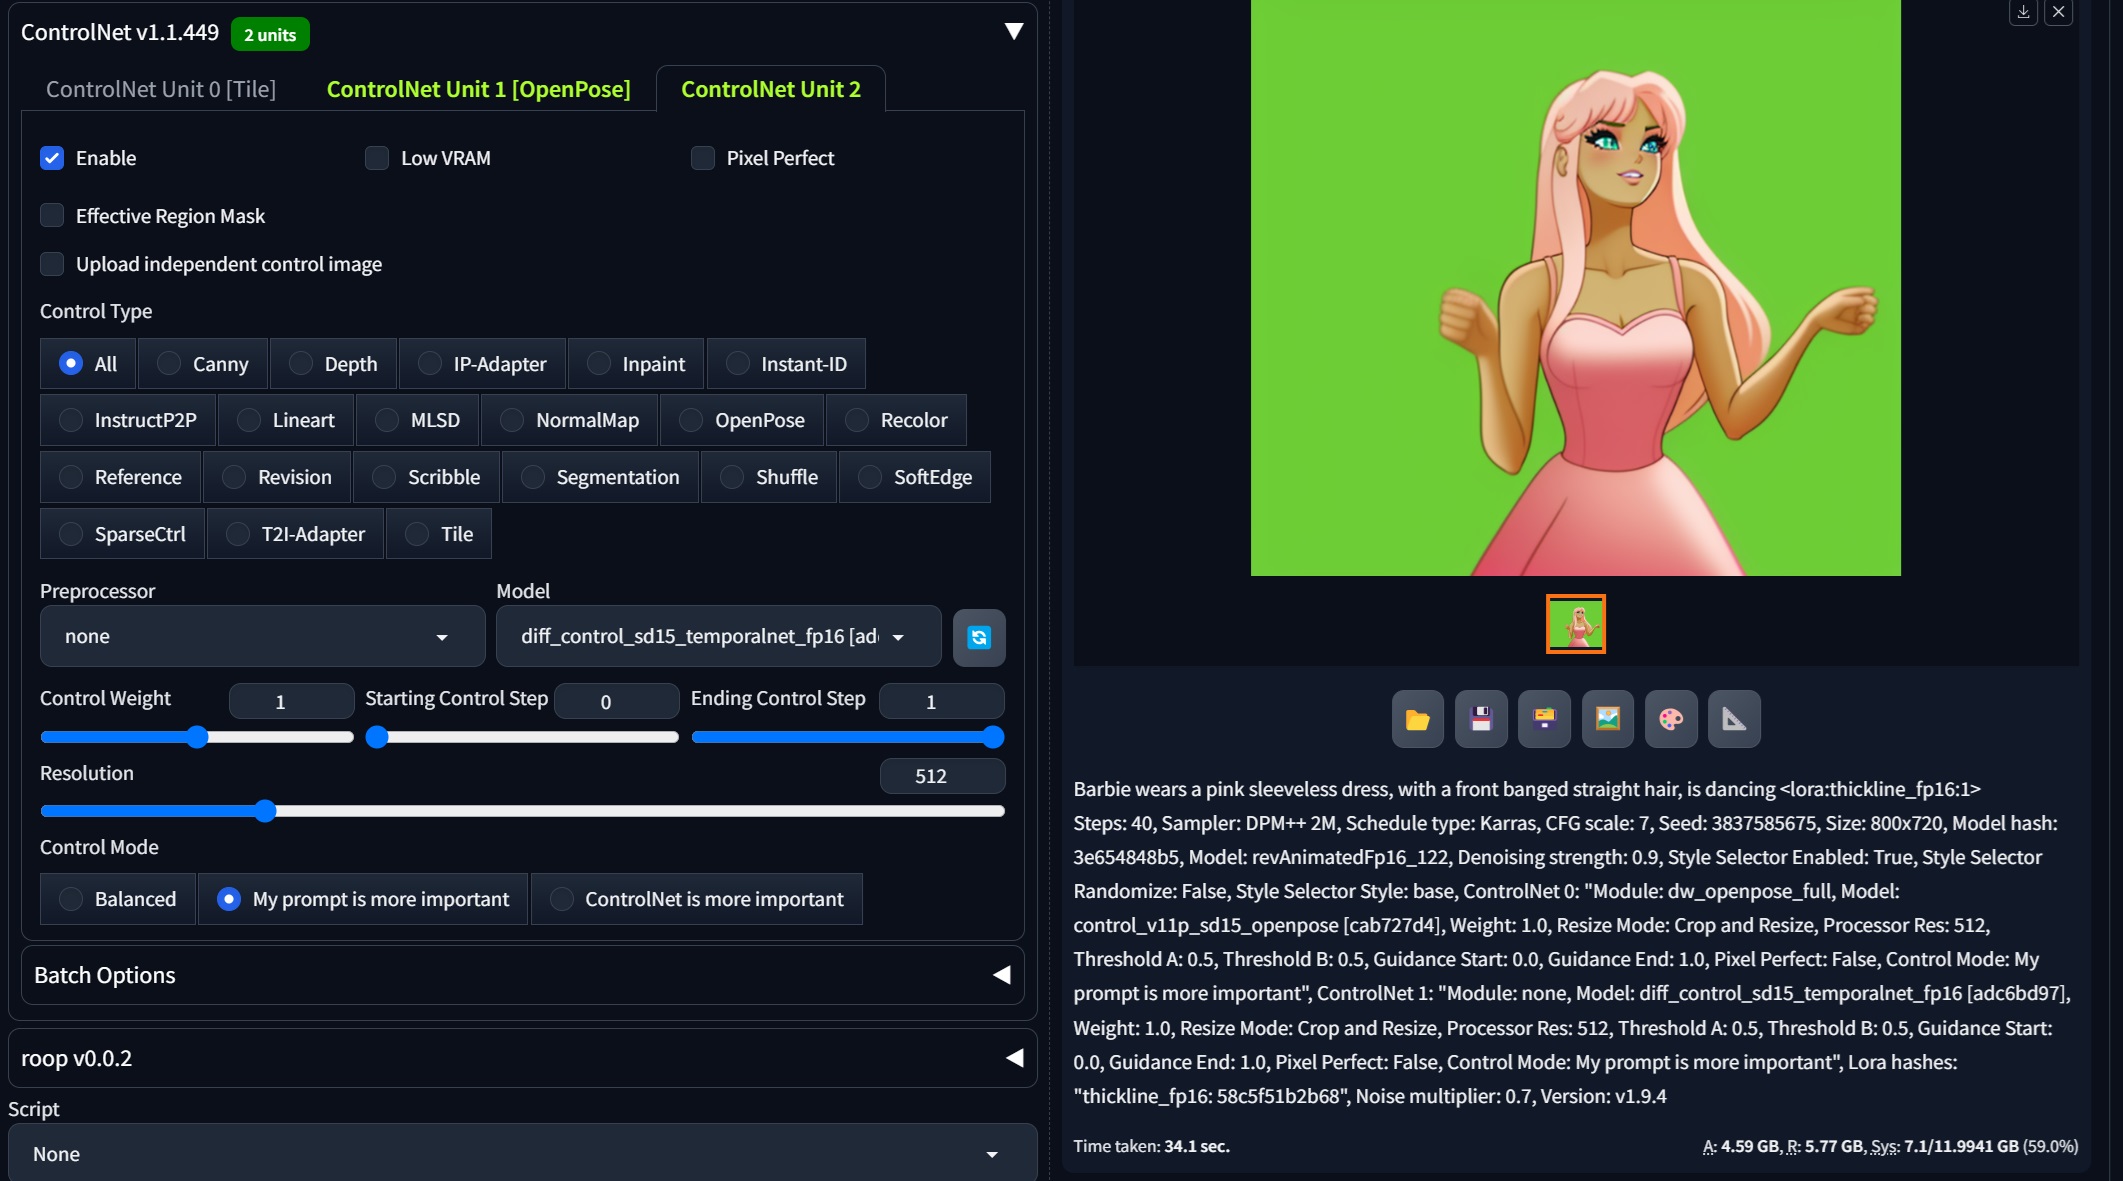
12. In ControlNet Unit 1, check “Enable”. In Control Type, check “All”. Set the Preprocessor to be “None”, Set the Model to be “diff_control_sd15_temporalnet_fp16”. Check “My prompt is more important.” (see the screenshot below.)
13. Click the Generate button to generate one image. Adjust your prompt, noise multiplier, CFG scale and Denoising strength until you are happy with the rendered image. Copy the seed number from the output image to replace “-1” under the Seed field.
14. Under the Generation tab, click the “Batch” tab. Set the Input directory to the path of your image sequence. In the Output directory, set the path to where you want to save the output.
15. Click the Generate button. Monitor the progress in the Anaconda prompt. When it finishes, go to the output directory to check the result.
16. You can continue tuning prompt, the value of Noise multiplier, CFG Scale, and Denoising strength to suit your needs.
17. When you are happy with the result, import the output image sequence in After Effect or other video editing software to render as a video.