How to install AnimateDiff-Evolved in ComfyUI on Windows?
1. If you haven’t installed ComfyUI, go to install ComfyUI on windows. Following the instruction, you should have ComfyUI-Manager installed as well.
2. Run “run_nvidia_gpu.bat” or “run_cpu.bat” to open ComfyUI in a browser at http://127.0.0.1:8188/.
3. Click Manager button in the right panel. The ComfyUI Manager Menu opens. Click Customer Nodes Manager button, a window with a list of customer nodes pops up.
4. In this window, search for “Kosinkadink.” There are three custom nodes showing up. They are “ComfyUI-Advanced-ControlNet”, “AnimateDiff Evolved” and “ComfyUI-VidelHelperSuite.” Select all three and Install them. When the installation finishes, click “RESTART” to restart ComfyUI.
5. Go to download animatediff motion models, such as “mm_sd_v15_v2.ckpt” and “v3_sd15_mm.ckpt” etc. Put them at “ComfyUI\custom_nodes\ComfyUI-AnimateDiff-Evolved\models” directory.
6. You can download additional stabilized motion modules at AD_stabilized_motion and put at “ComfyUI\custom_nodes\ComfyUI-AnimateDiff-Evolved\models” directory.
6. On the same page, download motion lora models, such as “v2_lora_PanLeft.ckpt”, “v2_lora_PanRight.ckpt” … “v2_lora_ZoomIn.ckpt” and “v2_lora_ZoomOut.ckpt” total eight motion lora models. Put them at “ComfyUI\custom_nodes\ComfyUI-AnimateDiff-Evolved\motion_lora” directory.
7. Go to download VAE model, and put it at “ComfyUI\models\vae” directory.
8. If you haven’t install ControlNet, go to install ControlNet in ComfyUI.
9. To test the installation, go to comfyui-animatediff-evolved samples. In this section, there are many animatediff-evolved workflow examples. Drag one of them, e.g “txt2img – 48 frame animation with 16 context_length,” to your ComfyUI in the browser.
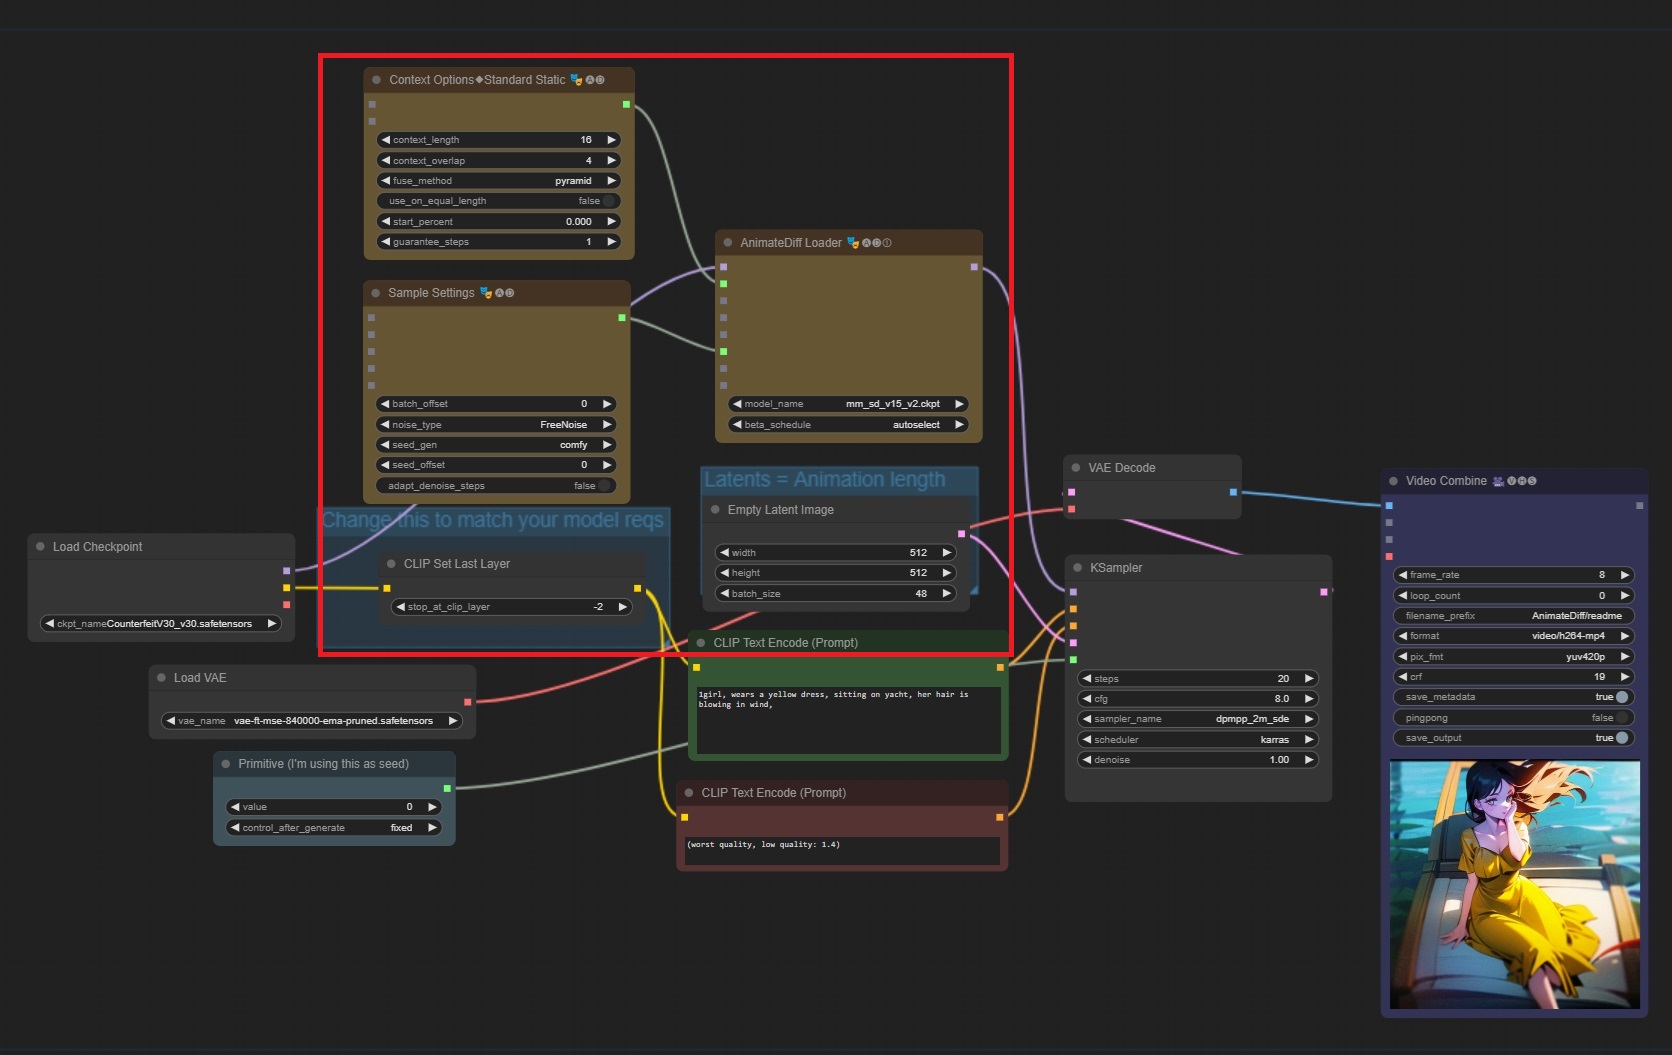
10. Let’s look at the workflow. The animatediff nodes are hightlighed in red (see above image). In AnimateDiff Loader node, select a motion model, such as “mm_sd_v15_v2.ckpt.”
11. The Context Options node helps to extend the output video to more frames. In Latents = Animation Length node, keep the batch size to the default value 48.
12. To run the workflow, in Load Checkpoint node, select a checkpoint in your “ComfyUI\models\checkpoints” directory. In Load VAE node, select the VAE model you downloaded. Change the prompt to describe your video.
13. Click Queue Prompt button to run the workflow. Monitor the progress in the ComfyUI console.
14. When it finishes, a new video is showing at Video Combine node. The output image is also saved at “ComfyUI\output” directory.
What are Context Options and View Options in AnimateDiff-Evolved?
The Context Options and View Options provide techniques used to extend the lengths of animations to get around the sweetspot limitations of AnimateDiff models (typically 16 frames). They help to extend the output video up to 48 frames (Increasing frame number too much cannot guarantee good results ).